Friday, June 5, 2009

Saving water and plants!

Tips that help conserve water and plants


How can you use water responsibly and also maintain a beautiful, healthy yard and garden? These practical tips will help you efficiently accomplish both, leaving you more time to enjoy your landscape. Read on to learn more...

Efficient Water Use Tips for Your Landscape Water wisely.
The efficient way to water is a few times for shorter periods, with 15-minute breaks in between. This allows water sufficient time to soak in and helps prevent wasteful runoff.

Water on time.
The ideal time to water is in the morning between 5 a.m. and 10 a.m. Later in the day, water can be wasted due to wind drift and evaporation; watering at night will cause grass to remain wet which can allow fungus to grow.

Water at the roots.
Low-volume drip irrigation is recommended when watering individual trees, flowerbeds, potted containers or other non-grass areas. This efficient method reduces water waste due to evaporation or runoff.

Water by zones.
Divide your landscape into separate irrigation zones. This way grass can be watered separately and more frequently than groundcover plants, shrubs and trees.

Water only what grows.
If you have an automatic sprinkler system, make sure the sprinklers are adjusted properly to avoid the wasteful watering of sidewalks and driveways.

Make inspections. Routinely check your sprinklers to make sure everything is working properly; a clogged sprinkler or a broken line doesn't benefit your landscape or your water bill.

Be flexible. Adjust your automatic sprinkler system as the weather and seasons change. Or better yet, install a shut-off device that automatically detects rain, which allows you to take advantage of the water nature provides without having to pay for it. Be sure to check with your local water agency for any restrictions in watering your yard and garden. To learn more about water-efficient automatic sprinkler systems, or for more water-savings tips, please visit www.rainbird.com.

Please contact us if you have any questions...
arborlife@arborlife.com


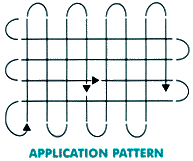
WATER SMART: Rain Bird I-Tip: 5 Fast Irrigation Fixes Summer is fast approaching and so is the relentless summer sun that can take a toll on your lawn and garden. A quick, weekly check of your irrigation system will help ensure you don't run into bigger problems later on. Here are a few simple suggestions to help keep your sprinkler system in top shape. After mowing, use the "manual" setting on your sprinkler timer to turn on each sprinkler station for a couple minutes at a time. Then walk around and visually check for these potential problems: Misaligned heads: Adjust any sprinkler heads that may have shifted and are watering the street, patio, sidewalk or driveway. Obstructed heads: Taller grass around sprinkler heads may block your intended spray pattern and prevent water from reaching your lawn or other plants. Make sure you have at least 3- or 4-inch pop-up sprinklers to fully clear taller grass. You may also need to trim back overgrown plant material that may be blocking the spray. Broken parts: Look for parts that may have been broken by lawnmowers or foot traffic. Replace any broken parts, being sure to match the spray pattern and distance for peak performance. Clogged nozzles: Dirt, small rocks or other debris can occasionally clog sprinkler heads. If you notice any heads that appear clogged, simply turn off the zone, unscrew the nozzle, then rinse the nozzle and filter screen in some clean water. Once cleared, replace the nozzle and filter screen, checking to make sure the spray is aligned properly. Head-to-head coverage: For even, efficient watering, each sprinkler's spray should just reach the next sprinkler head. Under-spray may result in dry spots that can eventually turn brown, while over-spray wastes water. Periodically checking your sprinklers to make sure everything is working properly will help keep your landscape looking great all summer long. More great tips can be found at www.RainBird.com

TEXAS LAWN WATERING GUIDE Did you know? Landscape irrigation can account for more than 50 percent of all the water used in Texas during the summer. Unfortunately, about half of this water is wasted due to over-watering or runoff. Soil type, landscape slope, water requirements of the turfgrass type, and sprinkler efficiency all affect how often you need to water. Established plantings do well in the summer when watered about once a week, especially if mulch is placed around plants. Mulch reduces evaporation of water from the soil and moderates soil temperatures. Low output sprinkler heads, bubblers, or drip irrigation systems will decrease runoff and are efficient ways to apply water. Turfgrass takes on a dull, dark appearance and leaves begin to roll when they need water. Apply enough water to wet the soil to a depth of four to six inches, reaching the plant's root system. Use a soil probe or screwdriver to determine the depth the water actually reaches. The "TEXAS LAWN WATERING GUIDE" Pamphlet contains many tips about things you can do to reduce your water bill... Cinco Ranch MUD #9 and Cinco MUD #1 have arranged to make available, to all Cinco Residents, printed copies of the Water Smart Pamphlets in the lobby of the Associations Office. Please contact us if you have any questions...
WaterSmart@CincoRanchPOA.com [Photo] Be Water Smart Lawn Watering Guide Pamphlet

[Photo] Helping Stressed Plants When a plant is struggling, often times gardeners mistakenly believe that it is because the plant is not receiving enough water. This is not always the case, as plants can also suffer due to excessive water, sudden weather changes or soil problems. Read on to learn how to identify the signs of plant stress... A plant's leaves provide the first and most obvious signs that something might be wrong. Here are some tips to help you interpret what your plants are trying to tell you: Wilted Foliage Wilted foliage usually means the plant is short of water, but that is not always the case. Roots growing in soil that is too wet can also cause wilting. Adjust your sprinkler system so that the plants receive adequate but not excessive water. Throughout the spring and summer months, make sure to keep a close eye on plants that have exhibited symptoms of over watering. Warning signs include excessively moist soil surrounding the root zone, mushrooms growing in turf or flower beds and excessive moss growth. Also, remember that plants of different ages require different levels of water. Young plants may require daily watering in the soil immediately surrounding the base of the plant. Conversely, mature trees and shrubs should not be watered near the trunk, as this may lead to root and crown disease. Mature plants should be watered as needed and moderately beneath the plants' canopy, with the sprinklers spraying water away from the tree's trunk. Dropping Leaves Drying and falling leaves on the inside of evergreens indicate they are aging and giving up nitrogen to the younger leaves. You'll see this on olives, oleanders, pines and most evergreen bushes. It may also indicate the leaves are not getting enough sunlight, or the plant suffered through a dry spell or shock after transplanting. As trees age, leaves do drop more. To address this issue, you may want to add supplements to your soil - consult your local nursery as to which fertilizers would work best for your soil type and plant material. Brown, Dead Leaves Leaves with brown and dead edges may suggest excess salts in the soil due to poor drainage or compacted soil, which is very common in the Western part of the U.S. Aerating and adding appropriate amounts of soil supplements may help your turf and plants recover from an imbalance in your soil - but consult a gardener before attempting to solve any potential soil problems. Dead leaves suggest that the plant may have been stressed for water on a hot, dry, windy day. Dead spots on top of leaf centers, especially the exposed leaves, may also suggest sun burning. This can happen when the plant is hot and stressed for moisture, even if just for a few minutes. A little extra spot watering with a water wand in the stressed areas can help plants and grasses recover without over watering the other regions in the zone. Dull or Bluish Leaves Small leaves that are dull or bluish usually tell you that plants are struggling for water. This is especially true in lawns. This condition could be due to a long stretch of hot weather, or simply that your landscape is not receiving sufficient water for its needs. Adjust your irrigation timer to provide more water to zones that appear stressed, but exercise caution to prevent over watering and possible runoff. Remember to adjust your timer back to lower levels after the hot weather has passed. PLEASE SHOW SUPPORT FOR THE WATER SMART PROGRAM BY DISPLAYING A DECAL IN THE BACK WINDOW OF YOUR CAR. CONTACT CINCO MUD #9 FOR A FREE DECAL. WaterSmart@CincoRanchPOA.com

BE WATER-WISE OUTDOORS

Many Texas water utilities charge higher rates during the summer or increase rates in increments based on use. Reducing your outdoor water use by following these steps can produce substantial savings in your water bill. Determine how much water your landscape needs to stay healthy

Use water-wise landscape maintenance practices such as proper mowing, mulching, and moderate fertilizing.Minimize water evaporation by using the most efficient equipment for each situation and keep the equipment well-maintained.

Design a water-wise landscape by planting drought-tolerant plants that are native or well adapted to the Texas climate. This pamphlet will answer these questions... When should I water? How often should I water? How long should I water? What should I water? How long should my grass be?

The "WATER CONSERVING TIPS" Pamphlet contains many tips about things you can do to reduce your water bill... Don't over water your lawn. One inch of water per week in the summer will keep most Texas grasses healthy. To determine how long you should run your sprinklers, place straight-edged cans at different distances away from the sprinkler and time how long it takes to fill an average of 1 inch of water in each can. (one or two pound coffee cans are perfect, but any size will work) Use lots of mulch around your shrubs and trees. It will retain moisture, reduce run-off, moderate soil temperatures and help with weed control.

BE WATER SMART INDOORS Why? According to the Texas State Water Plan, Texas' existing water sources will meet only 75 percent of the projected water demand by 2050. Single-family residential indoor water use in the U.S. is an average of 69 gallons per person per day. You can easily save 20 gallons per person per day by just installing water efficient fixtures and reducing leaks, Practicing good water use habits can save even more. Using water more efficiently will also save energy and money, and protect the quality of life for future generations. We must be responsible and save water now.

Irrigating Trees Having a few trees in your yard is more than just a great way to beautify your landscape.

Trees also provide shade which helps keep your yard cool, so your lawn, plants and flowers need less watering.

Trees are frequently overlooked when planning an irrigation system. It is a common misconception that tree roots will naturally “grow towards water.”

On the contrary, tree roots do not grow through dry soil. They require proper watering that encourages roots to grow deep and spread out to provide a sturdy base for the tree. Here are a few irrigation tips to help keep your trees healthy and vibrant:

*In general, trees should be watered enough to penetrate the soil to a depth of at least 18 inches. The type of tree and the season will determine your watering schedule. Check with a professional landscaper if you're unsure how much water the trees in your landscape require.

*Proper watering of new trees is very important, especially during the first year after planting. New trees require more water at the base than established trees, since new trees have not yet spread their roots out into the surrounding soil.

If you have just planted a new tree, you should completely soak the root ball and the area beneath the canopy when you water. Make a basin by mounding up a ring of dirt around the tree to help direct water towards the root ball. Unlike newly planted grass, trees should be watered for longer periods of time, but the watering should occur less frequently. The longer soaking will reach deeper into the soil which encourages a deeper, drought-resistant root zone. It is important to remember that too much water can kill a tree as easily as too little water. Overwatering prevents tree roots from getting the oxygen they need to stay healthy. Make sure the root area is moist, but do not let the tree stand in water for more than a couple of hours before it soaks in. If you have heavy clay soil, mix some coarse compost into the soil, or raise the area to improve drainage. For established and mature trees, proper irrigation continues to be important. As a tree matures, you should stop watering directly onto the base of the tree and expand the watering zone out around the tree. One way to effectively meet a tree’s watering needs is to use drip irrigation around the tree reaching out as far as the canopy. By expanding the irrigation in a loop around the tree, you will be encouraging the tree to develop an expansive and healthy root system. We hope you've found this tip useful. For additional information, take a look at the following pages of Rain Bird's website:
www.RainBird.com Please show support for the Water Smart program by displaying a decal. Contact Cinco MUD #9 for a free decal. WaterSmart@CincoRanchPOA.com


[Photo] Installing an invisible drip system [Photo]Drip irrigation for potted plants is surprisingly simple to install and can offer a more efficient and convenient watering solution. A well designed drip system will save water, save time and prevent waste. Read on for a step-by-step guide to see just how easy it is to install drip irrigation on a patio or deck. 6 easy steps to efficiently water potted patio plants. Efficiently watering potted plants on decks and patios has been a challenge for homeowners, contractors and designers for years. In the past, people may have avoided drip, fearing it was too difficult and complex to install in patio applications. Often they used traditional spray systems, which may have resulted in overwatering and runoff leading to property damage. The other popular choice has been manual watering with hoses and watering cans, however these were inconvenient and time consuming. The Benefits of Drip A drip system installed on a deck or patio is virtually invisible and hassle-free. Other benefits include: Healthier, more vibrant plants, reducing runoff and puddling regular, consistent watering,

Reduced water bills, No unsightly hoses Installing an Invisible Drip System in 6 Easy Steps Step 1: Install a 1/4" barb connector into the main drip line.
Step 2: Attach 1/4" tubing to the 1/4" connector and run to the pot.
Step 3: Insert 1/4" tubing through the bottom of an empty pot.
Step 4: Attach a 1/4" tee to the 1/4" line, leaving two ends open.
Step 5: Attach 1/4" Landscape Drip line (length equal to the pot diameter) around the plant stem onto the open ends of the barb tee.

Step 6: Insert the plant into the pot and fill with soil, making sure to keep the Drip line ring above the soil. Lay the Drip line ring on top of the soil around the plant. Add mulch to cover if desired

You now have a virtually invisible drip system for watering your patio pots without hoses or puddles.

Thursday, April 23, 2009

The New Rotor!


The MP rotator provides the crucial ability to water small areas normally covered by pop-up spray heads, and to do this at a precipitation rate that is matched to typical rotor sprinklers. It is normally an extremely poor design practice to install pop-up spray sprinklers on the same station as rotor sprinklers due to the widely different precipitation rates between spray and rotor sprinklers. The MP Rotator has, however, been specifically designed with this application in mind. By matching the precipitation rate of typical rotors, the MP Rotator has made it practical to add those small problem areas that are tough to cover with rotors, yet keep those sprinklers on the same station as your rotors. In many cases this can save long runs of pipe or dedicated stations which result from small odd-shaped areas in the landscape located near large areas being irrigated by rotors. Sometimes, the use of only one or two of these MP Rotator nozzles can eliminate an additional station, resulting in savings on valves and allowing the use of smaller controllers.
I would recommend this application of rotor because of its high efficency and great coverage advantages. The MP Rotator® sprinkler is the intelligent choice for irrigation because it offers design, performance and cost advantages over sprays and single-stream, short-range rotors. The high-uniformity, low-application rate MP Rotator is also the most efficient, water-saving sprinkler in its class. The MP1000, MP2000, and MP3000 can be combined on the same station because they all maintain matched precipitation, even after arc and radius adjustment. This provides a new level of design and installation flexibility for turf and landscape irrigation. If you have any questions contact us at: http://www.arborlife.com/contact.html

Friday, April 17, 2009

The Beautiful Texas Sage!


Texas Sage

The Texas sage is a native of the Chihuahuan desert in Texas, New Mexico and northern Mexico. It is known as Texas Ranger or Silverleaf. This plant does well in the rugged conditions of the southwest. It has gained some popularity in the southeastern U.S., however is more susceptible to root rot in this humid location. This evergreen shrub is a member of the Scrophulariaceae family and it's genus name Leucophyllum means white-leaf. It is a low maintenance plant that will care for itself after some intial water supplements. It does not like artificial fertilizers, in fact the plant will bloom better if it is kept hungry.
Size: 5-8' tall, 4-6' wide -- Slow growth rate.
Habit: compactly rounded
Hardiness: Zone: 8 to 9(?)
Leaf: 1/2-1", obovate, silvery pubescense
Flower: 1" Bell shaped, rose,purple,white. Completely covers plant for a week in the summer.
Culture: Low humidity, very well-drained soil, acid or high pH soil, full sun, wind tolerant
Disease/Insects: Just Root rot.
Landscape Value: It's abundant flower display and silver foliage makes this plant a fine addition to any southwestern landscape. It is best used as a border or low screen, is also a good accent plant in perennial/wildflower beds.
Cultivars:
'White Cloud' and 'Alba'- White flowers
'Green Cloud' - Green Foliage
'Compactum' - smaller habit, pink flower
'Rain Cloud' - Violet-blue flower
'Thunder Cloud' - abundant purple flowers, drought tolerant
'Sierra Bouquet' - very silver foliage, lavender-blue flowers

Propagation: Take 4" inch cuttings of new growth after flowering in summer. Put cuttings in a 50/50 mix of perlite and sphagnum peat. Make sure the growing medium does not remain too soggy.. Rooting will take place in about 4 weeks. Plants can be started by seed but the stock will vary greatly. Lightly press, not cover, seeds in a moist medium, germination will be in 4 weeks.

Saturday, April 4, 2009

Soft Leaf Yucca

Yucca recurvifolia is a 4-6' tall evergreen shrub with lance shaped recurving to arching leaves. The foliage is more blue green than most Yucca spp. Soft Leaf Yucca is generally a single stem in youth and can become multi trunked with age. The growth habit is rosette in youth, with age the plant can become tree like. This Yucca will bloom late summer to fall, the flowers are creamy white and bell shaped and are borne on 3-5' spikes. This shrub has excellent heat and drought tolerance.

Hardiness: USDA Zones 6-9
Plant Use: Shrub
Exposure: Full Sun
Water Requirements: Low

Call us at : 281-914-7788; If you have any more questions about this material.

Sunday, March 29, 2009

Purple Fountain Grass!

Ornamental Grass: Fountain Grass
Fountain Grass is an upright-open, mound forming plant that usually grows 12 inches to 3 feet. This is an excellent ornamental grass and should be used as an accent or specimen plant, in the middle of borders, and with other perennials. A mass planting produces a colorful display when in full bloom. Fountain Grass does well as a transitional grass between formal and natural areas. Flowering occurs in July and goes through the fall. Flower color changes from whitish purple to coppery purple and persists well into the winter. Fall foliage is yellow-gold. Fountain grass grows well in any fertile, moist, wet or well-drained soil. It prefers full sun to very light shade. If you would like to ask any questions concerning other ornamental grasses you can contact us at:http://www.arborlife.com/contact.html

Tuesday, March 24, 2009

Dwarf Yaupon Holly


Dwarf Yaupon Holly

Ilex vomitoria 'Nana' - Dwarf Yaupon Holly

The Dwarf Yaupon Holly is a small evergreen shrub that has a refine and attractive look, it can get 5 feet in height and 8-10 feet in width. Dwarf Yaupon can be very formal when sheared, or a small mound if not. Often this shrub is seen as little "meatballs" in the landscape. Produces inconspicuous scarlet-red berries.

Hardiness: USDA Zones 7-10
Plant Use:
Shrub
Exposure:
Full Sun-Part Sun
Water Requirements:
Medium

Good for sunny locationsGood for partly sunny locations

Monday, March 23, 2009

" Every week I will explore plants that will make your outdoor living more spectacular"--E.D.


The Bi Color Iris

Dietes (Moraea) bicolor is a clumping perennial with sword like leaves and is a native to South Africa. Bicolor Iris naturally occurs near streams and wet areas in the Bathurst district of the Eastern Cape. Even though it is native to wet areas, it is drought tolerant as well. To keep clumps looking neat only cut back old damaged foliage and large seed heads for best results. Flowers are iris type, 2" in diameter, yellow with maroon blotches fading to brown. Bicolor Iris can reach up to 2 feet tall at maturity and works great as an upright effect in the landscape.

Hardiness: USDA Zones 8-11
Plant Use: Flowering Perennial
Exposure: Sun to Part Sun
Water Requirements: Medium

Good for sunny locationsGood for partly sunny locations

Wednesday, March 18, 2009

How to Install Sod Properly


How to Install New Grass Properly!

1. Remove all debris from area to be planted. This includes sticks, bricks, old lumber, and anything else that might impede root growth.

2.The next step is very critical to proper turf establishment. The existing soil must be tilled to a depth of at least 6". This will break up any hardpan that may have developed. Without this step the turf root system will be unable to develop properly. This in turn will cause severe stress during the dry periods as well as very cold periods.

3.If the soil you currently have is a compacted clay you will need to apply approximately 3 to 4 inches of good topsoil, after you have tilled the existing soil. This will create an excellent medium for your sod to attach itself to and enhance early establishment. During periods of excessive rainfall this alluvial topsoil will help move the excessive moisture away from the plants growth points, therefore, reducing the chances of disease development and any other problems related to excessive moisture.

4. Prior to planting, the area must be leveled and any necessary drainage should be established at this time. Once the sod is down it will become very difficult to fill any low lying areas without doing excessive damage to the turf. Remember, this is normally a once in a life-time endeavor and the more time you spend on the little things now the fewer problems you will have in the long run.

5. Do not apply any pre-plant fertilizer or pre-emergent herbicide prior to planting. These two inputs can cause severe damage to the root system you are trying to estabfish. If you are planting a quality turf from a reputable dealer the turf should already contain an adequate amount of each of these to begin establishment.

6. Just prior to planting your sod you will want to cut away approximately 2 inches of dirt from any sidewalks, driveways, or curbs. This allows the turf to lay flush with the concrete and gives your job a much neater look, The excess dirt should be scattered across the yard so that you do not have any bumps under the sod.

7. You are now ready to start planting. Remember when you are making your sod selection, no matter what variety, there are basically two types of turf, quality sod and cheap sod. The two are never synonymous. Often times if you buy the cheapest sod you will also be buying problems that will consume your savings by the time they are corrected.

8. Once you have made your sod selection be sure you are ready to start planting as soon as the turf is delivered. The longer you wait the slower the rate of establishment for the turf. If the turf is not planted promptly you run the risk of your turf dying before it is ever planted.

9. Once the turf has been planted it should be watered immediately. Be sure you have adequate irrigation equipment to water your sod to a point of complete saturation, that is, where water begins to run off within a few hours. This watering to saturation should be done only once. Excessive watering will cause a lazy root system and damage the turf. The turf should then receive a light watering every 1 to 3 days as required. This procedure should continue until the sod firmly attaches itself with the new root system. Once this occurs watering should be curtailed to only during periods of wilting. This will require the root system to go down deeper in search of moisture and begin the establishment phase of a healthy turf. It is not uncommon for turf to go off color during the early stages after planting.

10. Fertilization and mowing should begin by the end of the third week. Fertilization should be done with a balanced fertilizer whose nitrogen source is in a slow release form. Fertilization should be done no more than three times during a growing season and very little nitrogen fertilizer should be used during very hot dry periods.

These steps are a recommended full scale planting program. Any deletion to these may cause slower turf establishment and decrease the quality of your turf.

Saturday, March 14, 2009

Fertilize Your Lawn!!!


Things to Consider when Fertilizing your Lawn!

Step #1 — Identify your Grass Type

Identify your grass as a cool or warm season grass. A large section of the U.S. is considered transitional, which means that both warm and cool season grasses may grow in the area. If you live in this area, a clue to your grass type is the fact that warm season grasses will turn brown after the first frost. Cool season grasses will generally stay green all year long in the cool and transitional zones. They will not survive the summers in the warm season zone.

Step #2 — Do a Soil Test

Determine the pH of your soil. pH is a measure of the alkalinity or acidity of a substance. The pH of your soil is important because it determines the ability of the fertilizer to use the ingredients in the fertilizer. Your soil test will determine which fertilizer is best for you.

Bring your soil as close to neutral as possible to get the most benefit from the fertilizer you use. A pH range between 6.0 and 7.0 is accepted as being the best for growing quality grass.

Step #3 — Determine your Lawn Size

The fertilizer package will tell you how many square feet of coverage it contains. Determine the square footage of lawn to be fertilized. Fertilizers, weed-killers and other soil amendments are typically sold by the amount necessary to cover a certain square footage. Determine this figure by multiplying the length of your lawn by its width. Then, subtract the square footage of the house, driveway and other areas not to be fertilized.


Fertilizing Warm Season Grasses

Fertilize when the grass starts to turn green in spring. The growing season for these grasses, depending upon the geographic area, is during late spring and summer. Warm season grasses grow best when the temperature is in the range of 80 to 95 ° Fahrenheit, although they will also grow outside of this range.

Begin fertilizing in late spring when the lawn begins to show signs of life. You may use either slow or quick release fertilizer, but time your fertilization regimen so the fertilizer will be used up before the onset of severe hot summer weather. Begin fertilizing again after the intense heat of the summer has subsided.

Always follow the manufacturer's instructions when fertilizing, and ensure that you time the life of the fertilizer so it is not present at the onset of severe hot or cold temperatures. Failing to do so could damage your lawn. When fertilizing, too much is not a good thing.

Broadcasting Granules

Spreader pattern

  1. Make sure the spreader and fertilizer are dry.


  2. Set the rate-of-flow lever according to the setting listed on the fertilizer bag. If you have any doubts, apply too little rather than too much.


  3. Close the hopper vent. Place the spreader on a hard surface and fill the hopper slowly. Wear gloves and be sure to keep fertilizer away from eyes and skin.


  4. For complete coverage, cut the recommended application rate in half and apply evenly in a criss-cross manner.


  5. Clean the spreader thoroughly after use.

If you have any questions concerning contact us at arborlife@arborlife.com!

Tuesday, March 10, 2009

Azaleas are Blooming!


Azaleas are in Bloom!
Here are some tips on planting azaleas!
1.Location:Planting azaleas in a spot cooled by partial shade, where the soil is acidic(Soil pH should be about 5.5; have your garden soil tested first before planting).It is a good idea to use a special soil when planting.
2.Red Oaks: Azalea and rhododendron plants like acid soil and have shallow roots, so a red oak is compatible with them will not mind acid soil.
3.Mulching and Water: Azaleas like mulch to help protect them from illness.They like water but just don't like to be sitting in it for long periods of time, which would cause their root to rot.
4. Pruning:Pruning azaleas should be undertaken immediately after they finish blooming (usually June or July). Pruning azaleas later than that risks interfering with the development of next year's buds. I see many lawn companies pruning the azaleas and other shrubs at the wrong time and this leads to unhealthy material.
5.Fertilization: It is important to fertilize azaleas twice a year to keep the soil acidic and give the azaleas a pretty zone. Call Arbor Life at 281-914-7788 if you have any other questions about this topic or other plant concerns for the spring.

Sunday, March 8, 2009

Pruning Trees are Important!


"God has cared for these trees, saved them from drought, disease, avalanches, and a thousand tempests and floods. But he cannot save them from fools."- John Muir

Tree Pruning is so important in the development and stability of a tree!
Here are some reasons for pruning:

1.Prune to promote plant health.
**Remove dead or dying branches injured by disease, severe insect infestation, animals, storms, or other adverse mechanical damage.
**Remove branches and branch stubs that rub together.
Avoid topping trees. Removing large branches leaves stubs that can cause several health problems.
**It also destroys the plant’s natural shape and promotes suckering and development of weak branch structure.

2.Prune to maintain plants and purposes in landscape design.
**Encouraging flower and fruit development,
maintaining a dense hedge, or
maintaining a desired tree form or special garden forms.
**Prune to improve plant appearance
Appearance in the landscape is essential to a plant’s usefulness. For most landscapes, a plant’s natural form is best. Avoid shearing shrubs into tight geometrical forms that can adversely affect flowering. Alter a plant’s natural form only if it needs to be confined or trained for a specific purpose.
** When plants are pruned well, it is difficult to see that they have been pruned!

3.Prune to control plant size.


4.Prune to protect people and property.
Remove dead branches from falling and hurting others.
Prune branches that obscure vision at intersections.
For security purposes, prune shrubs or tree branches that obscure the entry to your home.


I hope this gives us enough reasons for pruning! Let us protect and restore the trees in our neighborhood! Any more questions, contact us at arborlife@arborlife.com

Saturday, March 7, 2009

March is here and the time to plant is here!

"I am soo glad that spring is here! This is the time when we like to be outside and enjoy the weather and look around at our surroundings. As we enter in the spring, let us focus on one thing that tends to gets ignored...our St. Augustine grass! I will be giving you the steps that will create a green yard for the spring and going into the summer! Here we go!"

Number 1: Aeration is the start of great things to come!(early spring)

*Aeration helps to control thatch and helps out areas with clay soils!
*Be sure to mark sprinkler heads, shallow lines from sprinkler, underground utilities, cable, and septic lines before aerating so they will not be damaged.
*Soil cores are best left on the lawn surface; they typically work back into the grass in 2-4 weeks.
*Lawns may be fertilized and seeded immediately following aeration with or without further soil top dressing.
*If your soil is heavily compacted, you can apply stable, mature compost 1/4 inch deep. Rake the compost over the lawn, filling the aeration holes.
Make sure lawns are aerated once a year!

Number 2: Get Rid of Weeds and Bugs(early spring)

*This process can be done right after aeration!

* Go to your local store and find a granular product that is not a fertilizer but specifically for getting rid of weeds and pests.

*Make sure you follow the directions on bag for right spread and portion settings!

*Very important: Make sure you water in the granular very well after applying. This is important for any granular product that you use!

Number 3: Spring Fertilization

*Find a good fertilizer product that is specific the spring for your type of grass!

*Very important and can not stress this too much: Make sure you water in granular product very well!

Number 4: Summer Fertilization
*Make sure you increase your water times during the early morning or late night for heat index will be going up!


Number 5: Fall Fertilization(Start cutting back on watering)

*After fertilizing during this season, you will need to change your schedule for the winter is approaching!


I hope all this helps and if you ever have any more questions feel free to contact us at : arborlife@arborlife.com