Saturday, September 29, 2012

Cleaning Gutters in the Fall!


 Cleaning Gutters! 

The first thing you need to decide is how you're going to collect the leaves and other matter you remove from the gutters. When gutter contents are a bit damp, you can either use what I call the "scoop and drop" method or the "gutter bucket" method. For the gutter bucket method damp leaves allow a more dense packing of the bucket, and for the scoop and drop method, it stops the leaves from fluttering all over when you drop them. (The least messy way to clean gutters is when the gutter contents are dry and that method is discussed in the next section).
The scoop and drop method is when you scoop out the gutter and drop the contents to the ground onto a plastic tarp or drop cloth. This method is fastest and all you have to do is move the plastic tarp along with you as you move the ladder. When it gets full, just dump the leaves into your compost or trash bag.
The gutter bucket method is fairly common and involves taking a plastic bucket with a metal handle, cutting the handle in two at the center. Then bend the ends of the handle halves into hook shapes that you then hook onto the edge of the gutter. You simply scoop out the gutter and empty it into the bucket. Be ready to do a lot of up and down on the ladder though with this method since that bucket gets filled up quickly.

When you have dry gutter contents a better way to clean out and collect the dried leaves and sticks is what I call the "gutter bag" method.
With the gutter bag method you take a plastic bucket and fasten the handles similar to what we did in the gutter bucket method in the previous section. But here, you will cut off the bottom of the bucket creating a bottomless bucket.
Now, take a trash bag and fasten it around the bucket just under the metal handle. You can fasten it tightly with a large rubber band, or duct tape or a large Velcro strap. Now you can easily empty the dry contents into the plastic bag with the bucket serving as a form and throat for the bag. The reason this works well is that the leaves are dry so they are light, but bulky.
Make sure you don't fill the bag too full (heavy). Use your judgment with safety in mind when on the ladder.
With your method of leaf collection established from the previous two sections, it's now time for the fun part. Cleaning the gutters!
You can use any number of things to scoop the contents out of a gutter. You can fabricate your own scooper from a plastic jug with a handle but assuming you're not into making your own tools, you can just use a trowel or garden spade. You can even use old kitchen tools like a spatula.
  If you need our services contact us at www.arbor-life.com

Thursday, September 27, 2012

Pavers

First step needed to install pavers: Choose a paver. There are many from which to choose. There is one out there that's right for every project. If you'll be using brick, make sure you use paving bricks, rather than the type that is made for walls and outdoor fireplaces.


Mark the outside dimensions. If your project is square or rectangular, drive a spike into each corner and spray paint the lines between the spikes to mark where you will be digging. For an irregularly shaped project, simply mark the edges with spray paint. Call the Call Before You Dig phone number before you begin.


Get your shovel ready. It's time to dig. You need to remove about 8 1/2; inches of earth to install pavers and a base for them. This will allow for 5 inches of crushed stone, 1 inch of sand, and the thickness of the paver, which is generally about 2 1/2; inches. If your pavers are thicker or thinner, change your excavation depth accordingly. It may seem like there's a lot of digging required to install pavers properly, but it's worth the hard work. As you dig, periodically place a straight edge across the edges of the patio and measure down to check the depth of your hole. It is better to dig a little too deep than a little too shallow.


Fill it back in. Now that you've done all that hard work digging that hole, you're going to fill it back in. This may seem like cruel and unusual punishment, but it's the proper way to install pavers. First, install a layer of landscape fabric in the hole. Now add 5 inches of crushed stone. This will give your pavers a strong base yet allow them to remain flexible. This is especially important if you live in an area exposed to the freeze/thaw cycle. As you add crushed stone, periodically check for depth by laying a straight edge across and measuring down as you did before. Use a hand tamper or rent a compactor to compact the crushed stone.


Install another layer of landscape fabric. This serves two purposes. Like the first layer of fabric, it helps deter the growth of weeds. It will also prevent the layer of sand you are about to add from mixing with the crushed stone you just installed, while at the same time allowing water to drain through.


Install 1 inch of sand. This will be the setting bed that your pavers will rest in. The more time you spend getting this close to perfect, the easier the rest of the project will be.

To assist with installing the sand, we'll use 2x4s as our guides (you can also use long pieces of pipe for your guides). Sprinkle some sand along the perimeter of your project. Place the 2x4s along the edge. Using a level and tape measure, add or take away sand as needed to make the 2x4s flat and 2 1/2 inches (the thickness of your paver) below the top of your new walkway or patio. Once your guides are at the proper pitch and height, fill the rest of the space with sand, using a rake and trusting your eyes to make it as flat as possible.


Use a long 2x4 as a screed. Place each end of the long 2x4 on a guide. Slide the 2x4 across the guides, leveling the sand in the process. Go across the area three or four times, adding or taking away sand as necessary.


Compact. Using a hand tamper or compactor, compact the sand. This is a very important step. If you don't compact it, the sand will settle over time, which will cause the pavers to settle too, leaving you with dips and valleys in your project area.


Re-apply sand. Add a little more sand and repeat the screeding process. This should leave you with a nice flat surface for the pavers to be set in. After screeding, avoid walking on the sand.


Straight edge. Before you start to install pavers (called "setting the pavers"), you need a straight line to work off. You can use a long 2x4 as a straight edge, or, you can drive two spikes and hang a string line between them to serve as your straight edge. If you don't start straight, your pavers won't line-up properly.


Set the brick pavers. Finally, all the prep work is done. Like most construction projects, most of the work is in the preparation. Start placing your pavers in the sand, using your straight edge as a guide. Butt the pavers close together. There should still be a thin joint line between the pavers that will be filled with sand later. Use a level to check for flatness. Use a rubber mallet to knock down any high pavers. Add more sand and reset any low pavers. If you were careful leveling the sand with your screed, you shouldn't have to do much leveling now.


Cutting pavers. You may need to cut pavers along the edges of your project. Read this article to learn how to cut pavers.


Edging. The perimeter of your project will most likely need an edging to keep the pavers in place.


Polymeric sand. Now that all your pavers are set, it's time to fill in the spaces between them. You'll use special sand: polymeric sand. It's fine sand with additives that react with water to create a strong bond between the pavers. Using a large broom, sweep the sand between the joints of the pavers.


Clean. Using a broom or a leaf blower (it's easier) remove all the polymeric sand that is on the surface of the pavers. Really, all of it. In the next step we're going to add water to the equation and any sand that's left on the surface will stick to the pavers.


Last step needed to install pavers: Turn on the hose. Set your hose setting to a light mist and gently water all the pavers. The idea here is to get the polymers in the sand to activate. You don't want to flood the joints or the sand will wash out. A light mist will work well. Allow the sand to dry for 10 to 15 minutes and then wet it down again.
Contact us for more questions:
arborlife@arbor-life.com

Wednesday, September 26, 2012

Disappearing Fountains

How–to Disappearing Fountain Installation


A Disappearing Fountain is a great way to add the sound and movement of water to your garden. Water is pumped from a hidden reservoir buried in the ground through the fountain piece and then seemingly disappears into the ground.
Using a pre-molded Reservoir, (our NWG unit is shown – installation may vary depending on the reservoir you use; check the manufactures instructions), installing a Disappearing Fountain is easier than ever. Disappearing Fountains are safe for young children because there is no open water. They provide water to pets and wildlife. Birds often visit Disappearing Fountains for a drink of water; and the millstone fountain makes a great birdbath.

Disappearing Fountains can be created from nearly anything. Traditional choices are decorative pots, statues, fountains or waterfalls. We even created a Disappearing Fountain from a trashcan just to prove our point.
Pot or Piece Choices
Granite and Basalt pieces will last forever. Mexican Urns are unglazed, come in earth tones, and have a 1-5 year life expectancy. Glazed Pots and Cast Stone Statuary come in numerous sizes and shapes, in a wide range of colors and have a 20+ year life expectancy.
Installation Directions:
1.Dig your hole about 14? deep, (or the depth recommended by the basin manufacturer you choose) and fill the bottom with 1? of sand. Note - Before you start digging check for buried utilities, cables, and sprinkler systems.
2.Place the reservoir in the excavation and level.
3.Backfill soil around the box packing in firmly.
4.Cut a 1 ½´ x 2´ piece from the corner of one of the grates. This becomes the trapdoor for pump maintenance.
5.Place the cinder blocks in the box; one in each corner and one bridging the adjoining pieces of grating (including the trap door).
6.Place 2-3 cinder blocks (depending on the piece) in the middle. For light pieces place the grating on top of the cinder blocks. Heavy pieces require several cinder blocks and must sit directly on the blocks with the grate cut away to go around the piece.
7.Place the mesh over the grating; cut a hole in the mesh for the tubing.
8.Connect the tubing to the piece (leave a fairly long piece of tubing exiting the fountain).
9.Pots that hold a large volume of water will need a check valve or stand pipe connected to the tubing inside the piece to prevent the water from flowing out when the pump is turned off.
10.Place the pump inside the box. We recommend using a Cal Screen on the intake of the pump to protect the intake of the pump.
11.Thread the tubing through the cracks of the grating and slowly lower the piece into place. Once in place, level the pot using shims.
12.Connect the tubing to the pump and clamp.
13.Put the decorative topping around the piece on top of the grating and mesh.
14.Turn on pump and enjoy.
Choose the Right Reservoir
Although you may be tempted to opt for a smaller reservoir due to space, labor and cost considerations there are some good reasons to go with a larger reservoir.
1. The larger the reservoir the greater volume of water it can hold and the less often you need to re-fill it.
2. Tall pieces 4´ or higher need a bigger box, water droplets have farther to fall and thus tend to splash out of the reservoir boundaries.
3. Larger reservoirs give you the opportunity to add additional pieces to your fountain display.
4. Larger reservoirs allow for a greater water flow creating more water "music."
Instillation Tip
We've learned this the hard way; always connect the tubing to the piece and then to the pump not the other way around. We also recommend installing a valve on all pumps to control the flow of water coming out of the piece to match your expectations.
Care of Your Disappearing Fountain
The reservoir must be kept filled with water and can be accomplished in several ways:
1. Fill the fountain as needed with a garden hose.
2. Site the fountain near an irrigation head, so the sprinkler keeps the reservoir filled. Nelson's does not recommend using automatic fill devices because they frequently "stick" and don't shut off.
The fountain piece will need to be scrubbed occasionally to remove algae and scale. Fountec (safe for birds and pets) can be used to control algae growth but must be added every week. Use Protec to minimize hard water stains (especially on dark fountains or fountains close to windows) on a monthly basis. Note: Some folks prefer the natural patina of algae on the pieces, in which case no scrubbing, or Fountec, is necessary.

Wednesday, September 5, 2012

Good Autumn Plants to Plant!

 Here are some good choices for your Autumn Planting:


1.Aster

A wonderful cut flower, asters make any garden explode with color at the end of the growing season. From miniature alpine plants to giants up to 6 feet tall, there are over 250 asters, with plenty of colors to choose from. Asters are a great way to brighten up the fall landscape in your backyard.
  • Common Names: Aster, Michaelmas daisy.
  • Botanical Name: Aster.
  • Hardiness: Zones 3 to 8.
  • Bloom Time: Late summer through fall.
  • Size: 3 to 6 feet high (dwarf varieties are shorter).
  • Flowers: Purple, white, pink, blue, and red daisy-like flowers.
  • Light Needs: Full sun to partial shade.
  • Growing Advice: Can be planted any time during growing season, preferably early in northern states, so cultivars can get established before winter. Plant at least 2 feet apart with the crown even with the soil surface.
  • Prize Picks: For the ultimate in low-maintenance gardening, choose Purple Dome asters, which form a small, tight mass of blooms that require no pinching or staking. Alma Potschke can reach heights of 4 feet and usually need staking; its flowers are vivid pink.


2.Burning bush

One of the most common landscape plants in North America, this shrub is prized for its hardy constitution and brilliant fall foliage. It's one of the first shrubs to change color in autumn, when its dark-green leaves become blazing red. After the leaves drop, burning bush offers another season of interest. The stems have twisted and corky ridges that are especially pretty when covered with snow.
Burning bush has a dense growth habit and is easily pruned for use as a hedge. It thrives almost anywhere, tolerating a wide range of soil types and light conditions.
  • Common Name: Burning bush, winged euonymus, winged spindle tree.
  • Botanical Name: Euonymus alatus.
  • Hardiness: Zones 4 to 8 or 9.
  • Bloom Time: Inconspicuous, late spring.
  • Foliage: Toothed leaves are dark-green in spring and summer, and turn bright red in autumn.
  • Light needs: Full sun to light shade.
  • Growing Advice: Plant in a hole that's as deep as, but wider than, the root ball. For shrub borders, space plants 4 to 6 feet apart. Remove any twine or burlap after plants are in place.
  • Prize Picks: Compactus is more dense and compact than its full-sized relative.


3.Dahlia

These showy flowers quickly gained popularity after Spanish explorers discovered them in Central American gardens. The kings of Spain named them in honor of Swedish botanist Anders Dahl, who created many hybrids.
  • Common Names: Dahlia.
  • Botanical Name: Dahlia.
  • Hardiness: Zones 8 to 11.
  • Bloom Time: Midsummer to first frost.
  • Size: 2 to 8 feet high, 1 to 3 feet wide.
  • Flowers: Every color but blue and green; shape varies from pompon to daisy-like shapes.
  • Light needs: Full sun.
  • Growing Advice: Plant tuberous roots in spring after last frost, placing them 4 inches deep with "eye" pointing up. Stake taller varieties.
  • Prize Picks: 'Show 'N' Tell's' twisted red petals give this semi-cactus cultivar a tousled look. Ball dahlias - like the small white-tipped crimson bloom 'Kenora's Fireball' - offer a full pompom of inwardly-curved florets.


4.Japanese maple

The unique form, delicate and often colorful leaves and smooth gray bark give Japanese maples year-round appeal. These graceful trees work in traditional landscapes as well as theme gardens. There are more than 300 cultivars. With so many options, it's easy to picture one of these serene beauties in your landscape.
  • Common Names: Japanese maple.
  • Botanical Name: Acer palmatum.
  • Hardiness: Zones 5 or 6 to 8, depending on cultivar.
  • Bloom Time: May or June.
  • Size: 15 to 25 feet high, 15 to 25 feet wide.
  • Flower/Foliage: Small red to purple flower clusters; deeply lobed leaves with five to 11 "fingers." Summer colors range from green to red and purples, with autumn hues of various reds and golds.
  • Light Needs: Prefers dappled shade, but will tolerate full sun.
  • Growing Advice: Plant balled-and-burlapped or container-grown trees in late winter or early spring. This gives the trees a chance to establish themselves before the stress of summer's heat or winter's cold.
  • Prize Picks: Waterfall is considered the best of the green cutleaf forms and tolerates the heat found in Zone 8. If you're looking for season-long color, try the deep reddish-purple leaves of Bloodgood.

5.Smoketree

Have a burning desire for an easy-care plant that provides a lot of drama? A smoketree might be just the ticket. These deciduous trees and shrubs guarantee a stunning display in summer, when clouds of downy plume-shaped panicles seem to envelop the foliage in a smoky haze. As the weather cools and the panicles disappear, the leaves become bold shades of orange, red or yellow. Best of all, this unusual show will unfold with virtually no effort on your part.
  • Common Names: Smoketree, smokebush, Venetian sumac, chittamwood.
  • Botanical Name: Cotinus coggygria.
  • Hardiness: Zones 5 to 8.
  • Bloom Time: Insignificant flowers appear in June and July, followed by showy panicles through September.
  • Size: Most are 14 to 20 feet high and 10 to 15 feet wide.
  • Foliage: Oval green or purple leaves that become yellow, orange, scarlet, or purplish-red in fall.
  • Light Needs: Full sun to partial shade. Purple-leafed varieties produce the best color in full sun.
  • Growing Advice: Plant container-grown trees anytime during the growing season.
  • Prize Picks: One of the showiest varieties is Daydream smokebush, which produces heavy drifts of fluffy brownish-pink panicles and has a dense growth habit.


6.Indian grass

Indian grass will add stunning greens, golden bronzes and warm blues to your garden throughout the year with little work on your part in return. Its natural look lends itself as a transition from more formal spaces, though it looks great among wildflower gardens as well.
  • Common Names: Indian grass.
  • Botanical Name: Sorghastrum.
  • Hardiness: Zones 3 to 8.
  • Size: Up to 8 feet high and 2 feet wide.
  • Foliage: Blue-green leaves which turn purplish-blue in fall.
  • Flowers: Golden- or red-brown flowerheads.
  • Light Needs: Full sun.
  • Growing Advice: Avoid wet soil in winter. Divide in mid-spring or early summer.
  • Prize Picks: Sioux Blue has bright blue foliage and attains 4 to 6 feet.

7.Ornamental cabbage

Vegetables generally aren't grown for their beauty. Ornamental cabbage is definitely an exception. With vivid colors and showy rosettes of fall foliage, you wouldn't dare planting ornamental cabbage among its more edible counterparts. Instead, use as a colorful border or groundcover.
  • Common Names: Ornamental cabbage.
  • Botanical Name: Brassica oleracea var. capitata.
  • Hardiness: Annual.
  • Bloom Time: Grown for foliage.
  • Size: 10 to 18 inches high, 12 to 18 inches wide.
  • Foliage: Colorful green, lavender-blue, purple, red, pink, or white foliage intensifies in fall and early winter.
  • Light Needs: Full sun to partial shade.
  • Growing Advice: Seed directly in garden or small indoor containers 6 to 8 weeks before first predicted frost.
  • Prize Picks: For big drama, seek out Flamingo Plumes, which is purple with hot pink interior. Rose Bouquet and Frizzy White are superb examples of those colors. 

Please contact us if you need help with your landscaping at:
281-914-7788
www.arbor-life.com

Tuesday, September 4, 2012

Great Autumn Trees to Plant in Houston

Here are some great additions to your Garden that look great in the Fall!

Green Ash(is native Texas tree) is very hardy and has a brilliant yellow fall foliage. These are hard to find but ask us at 281-914-7788 or email us at : arborlife@arbor-life.com

Black Gum(non native tree)A native to the eastern U.S., Black Gum is noted for its outstanding and consistent fall red color. Its wood, which is very strong, was used in colonial times for water pipes.
red leaves
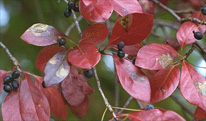
Following pollination, greenish flowers appearing in late spring develop into purple berries. It prefers moist soils and is
one of the most elegant trees of the North American lowlands. Like its name, nymph of the woods, the black gum or tupelo grows more graceful as the lives of those who fall in love with it move on from generation to generation. Its fall color comes early and is unmatched.
Swamp Chestnut-The leaves are simple, alternately arranged, 4" to 9" long, and 2 ½" to 5" wide. They are ob-ovate, broadest in the middle and above. The leaf base tapers to the petiole and the leaf tip is rounded. The upper leaf surface is lustrous, dark green and smooth while the underside is duller and fuzzy. Leaf margins are coarsely wavy-toothed. Leaves turn crimson in the fall.
Texas Pistache-(native tree)
This rare, evergreen tree from the Southwestern part of the state is an ideal choice for quickly screening out noise and poor views. Mature Texas pistache is a striking specimen tree, with its delicate foliage and attractive white, peeling bark. Trees are sexed, with female trees predominating. The small forming fruit is red, turning black as it dries. It is a favorite treat of songbirds and other wildlife. Foliage turns bronze/purple in the Fall and leaves regrow in late Winter.
Texas pistache is generally deer-resistant but tips will be nipped back when plants are small. We recommend only the most well drained locations for the plant, as it is susceptible to damage from prolonged contact with soggy soil.(look below at picture)
 Sassafras Tree is often grown as an ornamental tree for its unusual leaves and aromatic scent. Outside of its native area, it is occasionally cultivated in Europe.  Sassafras oil, is distilled from the root bark or the fruit. It was used as a fragrance in perfumes and soaps, food (sassafras tea and candy flavoring) and for aromatherapy. The smell of sassafras oil is said to make an excellent repellent for mosquitoes and other insects, which makes it a nice garden plant(which is good thing in Texas) Look below for tree picture! 

If you have any further questions about these trees or any other plants feel free to email us at : arborlife@arbor-life.com